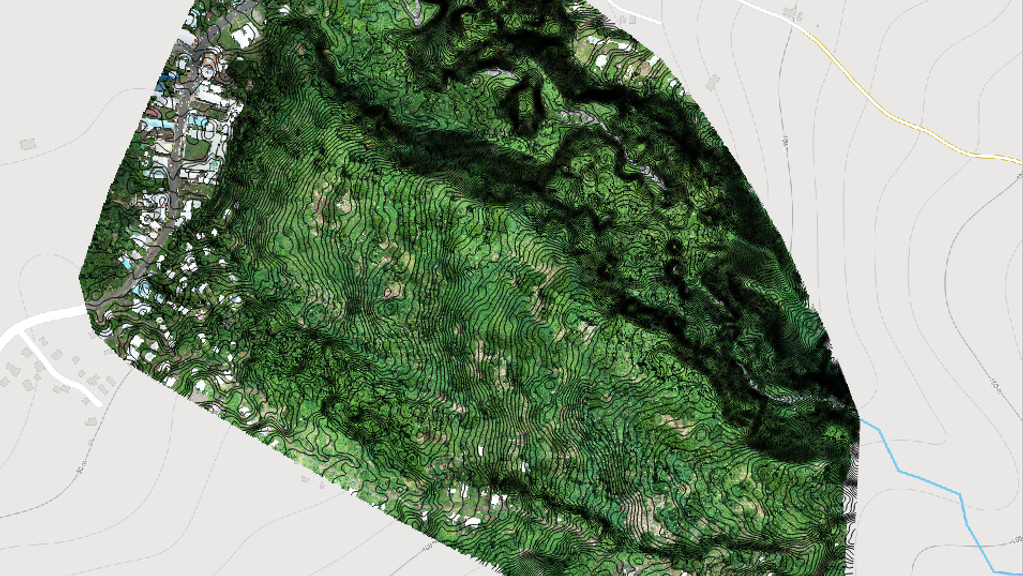
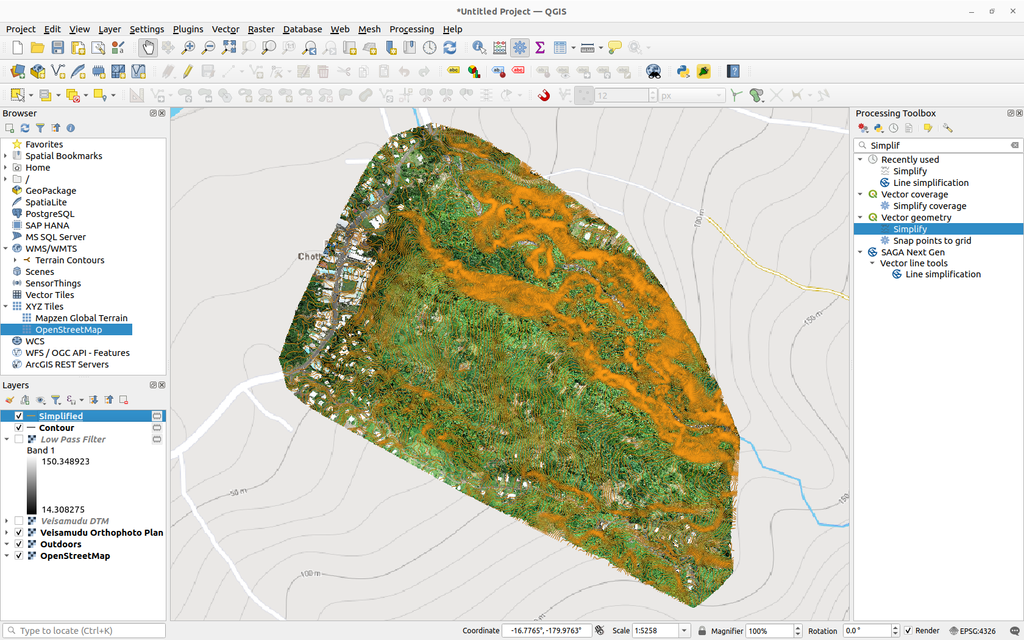
Pretty looking QGIS contour lines with Z coordinate exported to Autocad DXF
Recently we were working on a project of mapping a hundred something acres of undeveloped land in order to produce elevation contour lines and other data required for a company that was planning to subdivide the land for residential lots.
They needed data about terrain profile, slope, nearest creeks, roads and buildings currently present on that land and around.
As we mostly operate in the Fiji Islands. The local coordinate system used by surveyors is Fiji Map Grid or FMG for short. So all the data had to be presented in FMG CRS and have FMG valid X Y and Z coordinates.
Here we cut the mapping process short that would be enough of a story for a dedicated post and get straight to producing elevation contours and valid DXF file for Autocad.
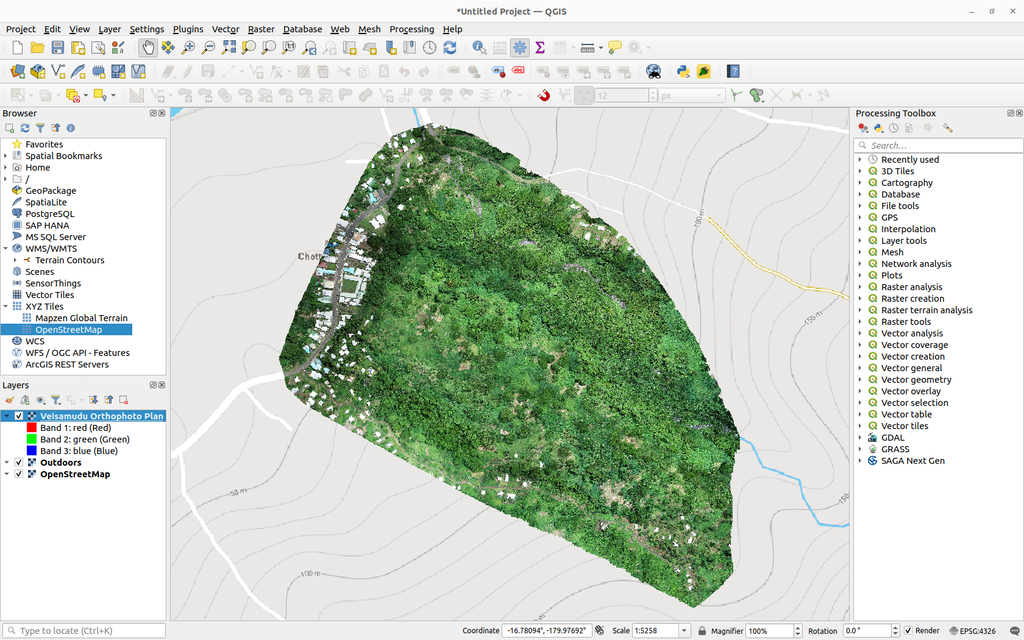
Open QGIS and add necessary layers.
- Oprhophoto map raster file in geo TIFF format
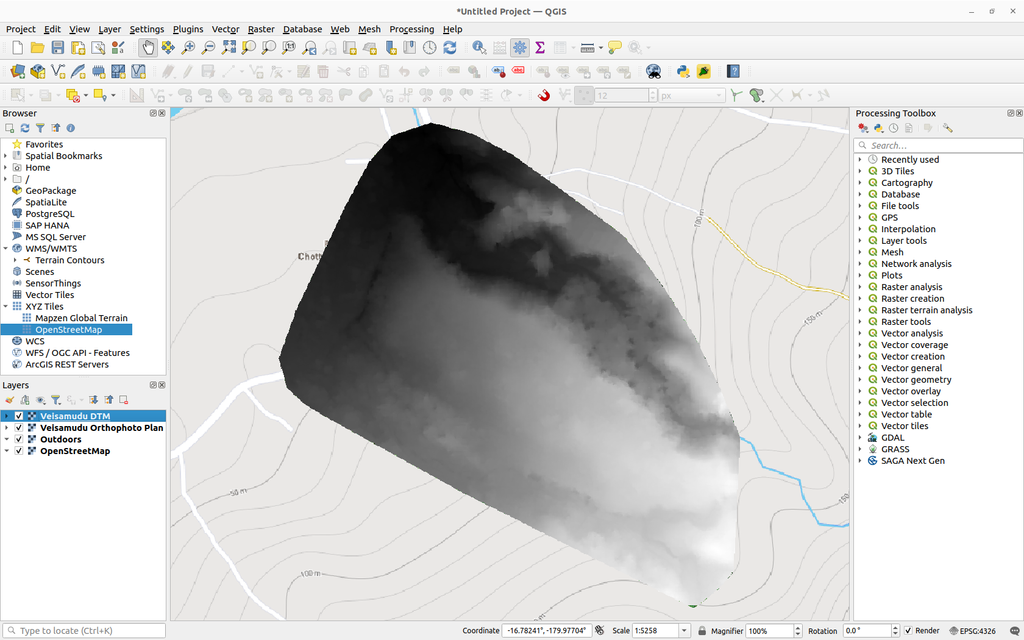
- DTM (Digital Terrain Model) raster file in geo TIFF format
Installing SAGA — Processing Saga NextGen Provider plugin
The digital terrain model, especially those we get from processing own aerial images usually come in high resolution.
When contour lines processed from high resolution digital terrain models they appear to be too rough and hard to read. Basically they will be too detailed and contours themselves will not be looking anything apealing but rather confusing or ambigous.
So for the purpose of getting pretty looking smooth contour lines we suggest to resample them ushing SAGA Resampling filter.
The DTM in our case has GSD resolution of 20 cm per pixel and in order to resample them we need to unstall SAGA GIS toolset.
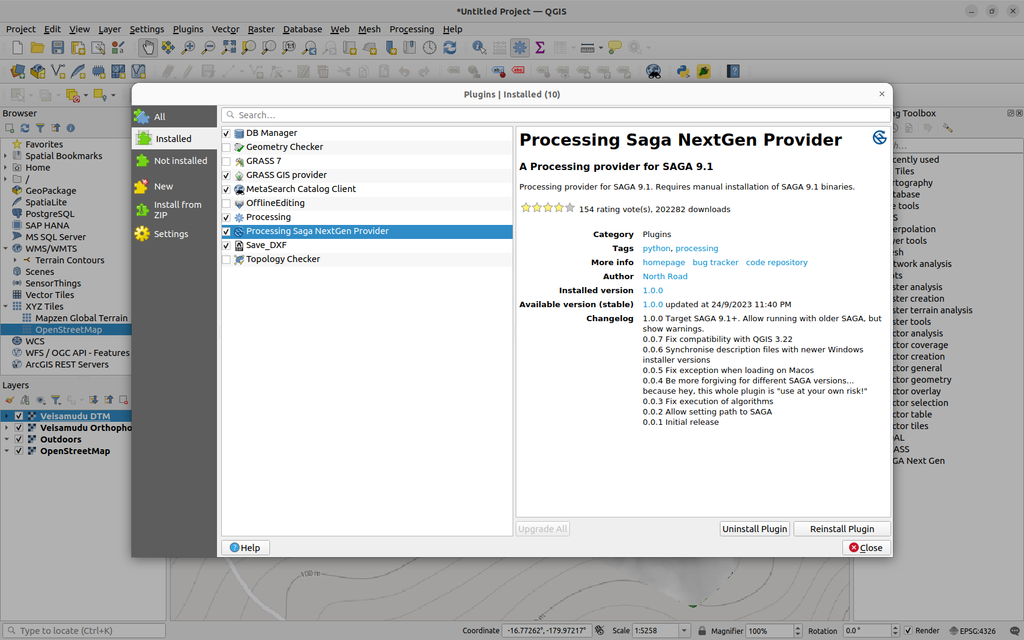
You don't need to install the SAGA GIS software itself, but the SAGA plugin for QGIS. You can find it by searching for plugins in QGIS Plugins section.
Just type SAGA and you should see Processing Saga NextGen Provider something like on the image bellow. Istall it and it should appear in your QGIS Pricessing toolbox.
Resampling DTM
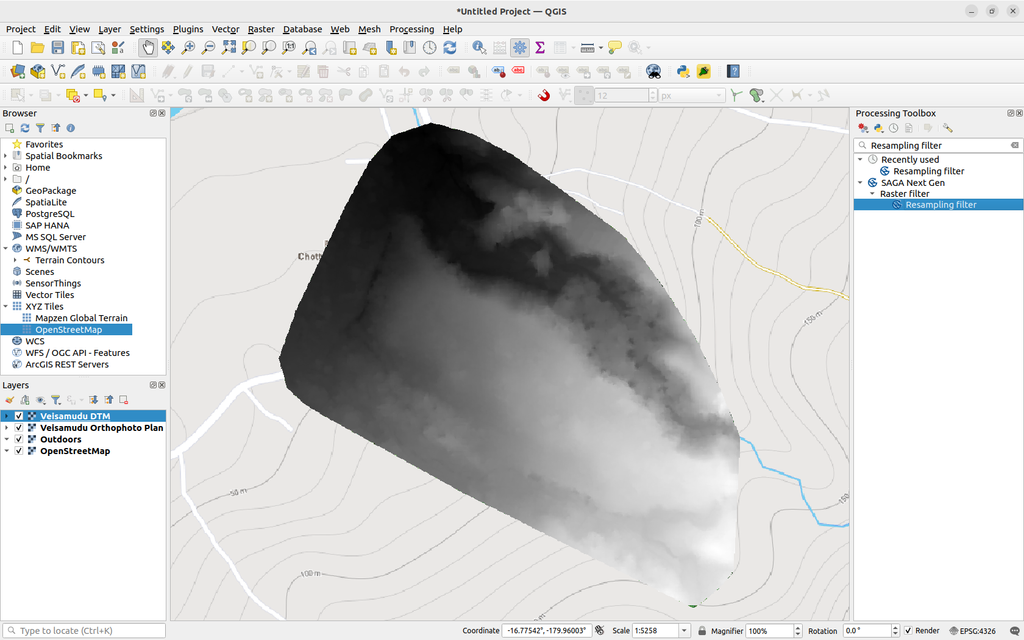
Once SAGA toolset installed, we can resample our DTM model
In QGIS Processing Toolbox type "Resampling filter" and it should come with SAGA Raster Resampling Filter as it shown on the image bellow.
Nest step. Click SAGA Raster Resampling Filter, set couple of parameters and RUN it.
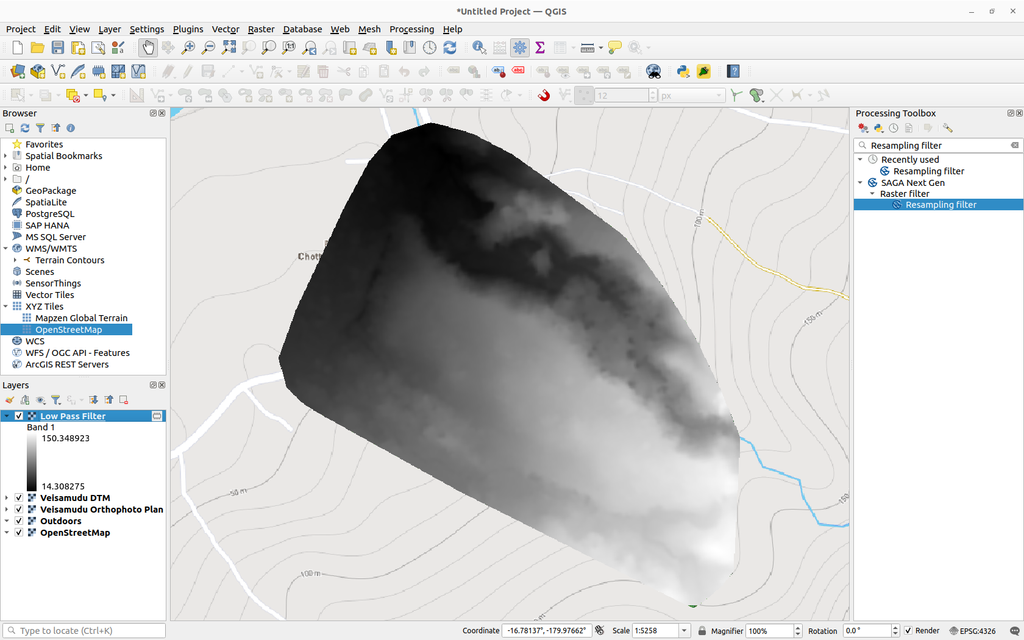
The parameters we set there is Scale Factor set to 25 and we don't heed High Pass filter results only Low Pass Filter so we remove checkbox from High Pass Filter and run it.
As a result we get Low Pass Filter layer that looks almost identical to the original DTM layer but slightly smoother that will produce smoother contour lines.
Producing elevation contour lines from DTM Low Pass Filter raster
In QGIS Processing Toolbox search type Contour.
There might be a few options in the result, but we only need SAGA Contour Lines one.
Other options would be not suitable for our purpose.
GDAL and GRASS Contour lines processing tools don't produce valid Z coordinate for the contour lines.
They produce flat 2D vector layer with only X and Y coordinate and elevation value they put in the Attributes Table.
That is alright if we want to use that layer in QGIS only, but not alright if we need to export data in Autocad as Z coordinate will not be imported and getting it in there from GDAL or GRASS processed contour lines will be slightly challenging. It's best to produce the data we need right from the beginning and SAGA here is the right tool to do that.
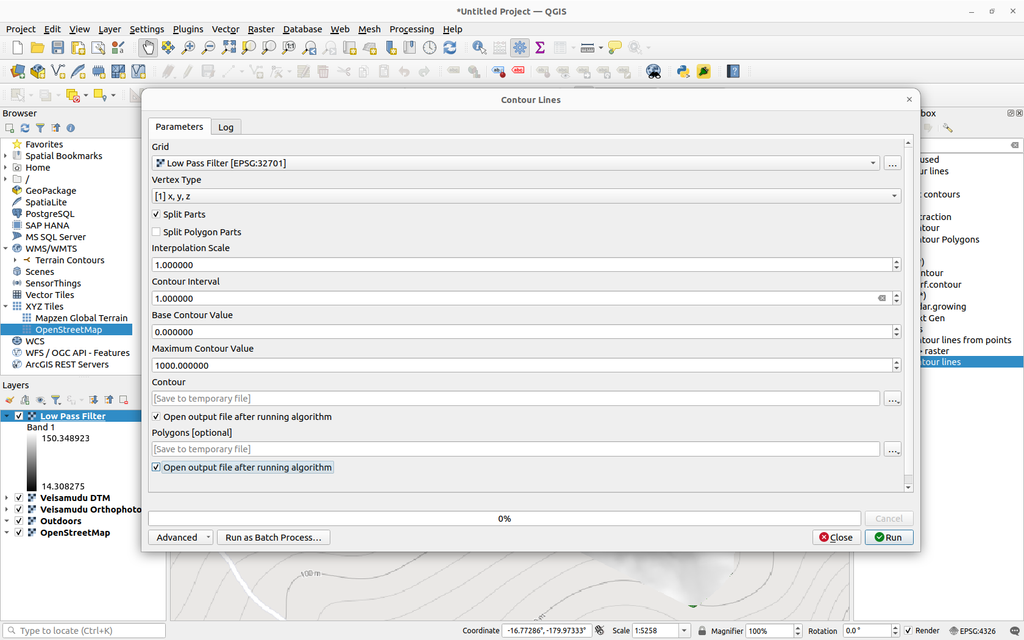
So. Click SAGA Contour Lines tool and set parameters up to you preference.
Make sure you select Vertex Type to x,y,z
And in our case we also set contour interval to 1 (it is 100 by default) but here we need 1 metre interval between the lines.
If you only need contours and not surface polygons, you can tick off the checkbox for Polygons and run the filter.
Depending on the size of the DTM raster it might take a while for the process to finish.
Simplifying the contour lines
The contour lines produced using SAGA Contour Lines filter might have too many points that might affect the size of the file or convenience of working with the data. You can leave the contours lines as they are or you might as well simplyfy them reducing the amount of points.
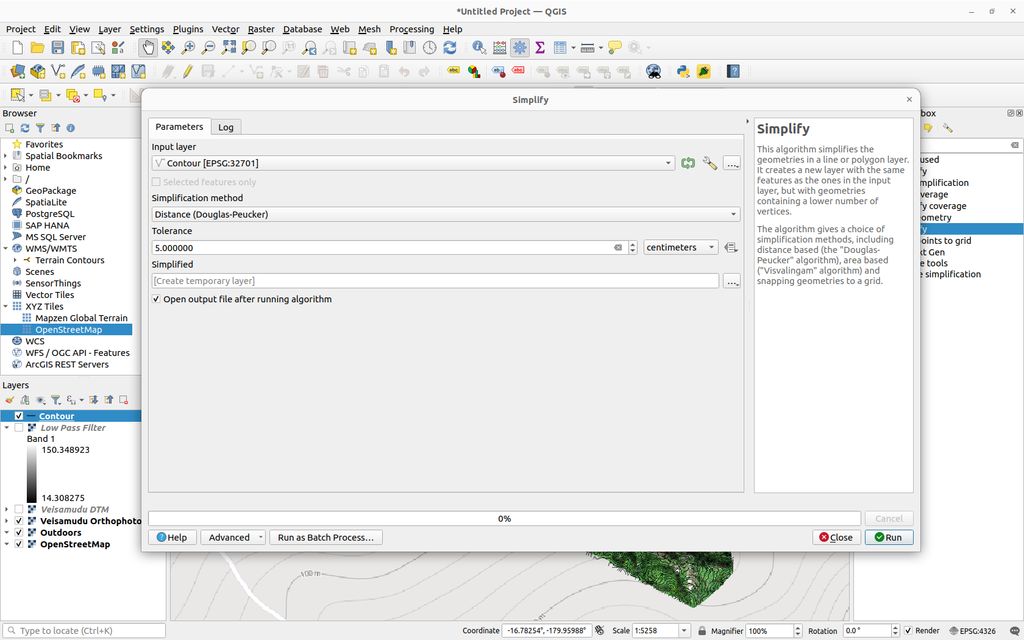
To achieve that you can use standard Simplyfy filter from QGIS Vector Geometry set of tools.
To simplyfy our elevation vector lines we set couple of parameters.
In our case (yours mighe be different) we set Tolerance in centimetres with value = 5
Then run the filter.
The filter produces less dense and easier to work and share elevation vector lines that eventually we can export in Autocad DXF file.
And finally we get the contour lines we need. With X,Y,Z coordinates ready to be exported in Autocad DXF
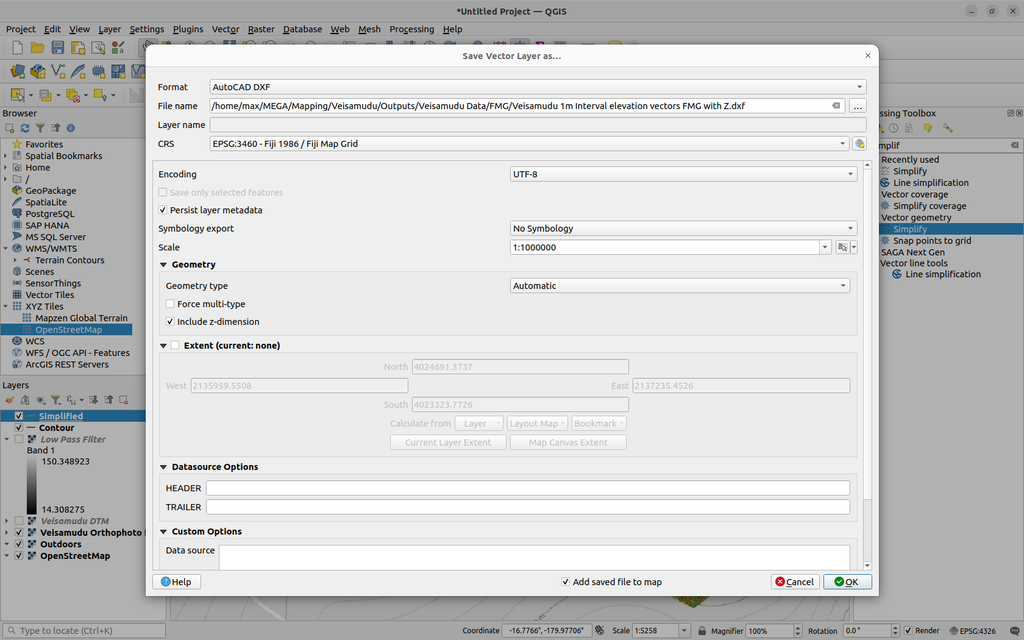
Right click on simplified contour lines, then Export >> Export Features As
Pick Autocad DXF from the list of formats and don't forget to set checkbox on "include z-dimension" and set the right CRS for the exported file.
That's how you get your drone mapping data to finally appear in Autocad for further use.
You can also save temporary layer with your elevation lines vector in one of QGIS native formats like ESRI Shapefile or geoJSON and upload it in MapHub Atlas for easy sharing with all parties that interested to see them.
Like for example we share the same contour lines using special link bellow